Now we all know what all of the fuss is all about.
In other words, must i say what all of the clucking is all about
We have had the women within our backyard for any couple of several weeks now, and my goodness, could they be fun! And the women haven’t even began lounging eggs!!!
We have only got four chickens, and they’re quite happy within their little A Frame Coop, let free throughout the day.
However if you simply fancy a fancier chicken house, you actually must browse the Shed Coop Plans that Whitney built some time back.
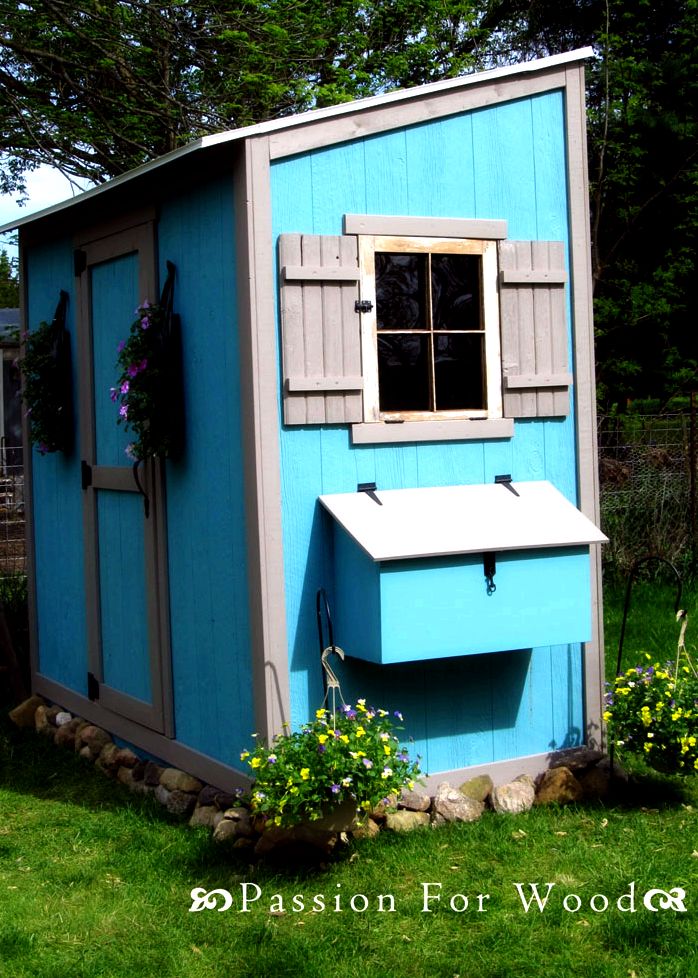
Hello Cuteness!!!!
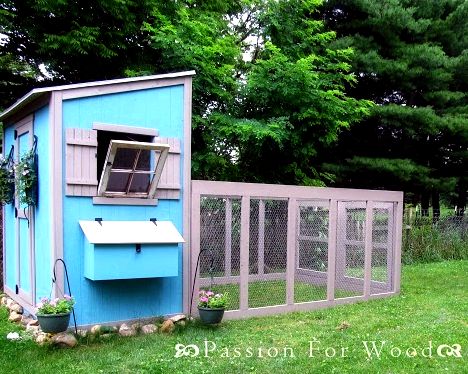
However the chicks in Whitney’s Shed Coop still needed a run. I have no idea if it’s correct that a contented chicken lays a much better egg, but I will tell you this: A contented chicken playing around inside a coop clucking can certainly make you happy better.
So Whitney and that i labored together to produce a coop plan that minimizes scraps and maximizes space savings. And an agenda that might be simple to build.
2 days later. Less than $200.
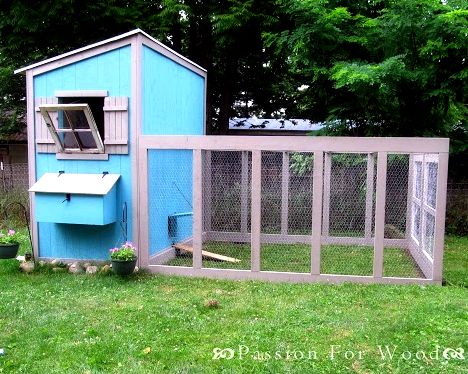
Whitney did a couple of modifications to make use of materials that are offered to her – particularly 24" chicken wire – so make certain you take a look at her publish here for more information.
Thanks Whitney! And obviously, the plans follow! Check them out!
Resourse: http://ana-white-colored.com/2012/06/plans/
Kitchen!
Video COMMENTS:
Doone226: Great work. The Kreg joinery is a great time saver.
Ana White: It is awesome!
Linn: Wow! Amazing work! Just out of curiosity. Is it cheaper (parts and wood) building a kitchen than getting one pre made?
O. Hartigan: Yes and no. For the boxes and face frames absolutely. For the doors however it's almost always cheaper to purchase premade from any number of websites. Google raw cabinet doors to get started.
Ana White: We will have about $2000 total in the cabinets, including drawers, doors and the carcasses. Its definitely cheaper, but you do need a few tools (table saw and Kreg Jig are very important).
Jaret + Jamie: Looooove it ! Can't wait to see it all finished! \nx Jamie
Carla Dowell: When you put the 1/4" ply on the end cabinet is it butting up to the face frame? Is your face frame flush with your cabinet box/carcass or is it 1/4" bigger all around? I love all your videos. I am building a tiny house and built all my cabinets from watching your videos. I used plugs on my end cabinet.
Ana White: So what I do is note the cabinets that have an exposed end, and overhang the face frame by 1/4" on those cabinets. You can do this on all cabinets, even those without end exposure if you want. The reason I like to keep it flush on the outside is it leaves a 3/4" lip on the inside that I can fur out with a 1x when adding drawers. Hope this makes sense.
Salvador Nobre Veiga: +Ana White curious about 2 things… what thickness is the plywood on the core of cabinets? And face frame? Also, whenever I use pocket holes I have trouble of the screw just going through the wood… do you put your drill in special setting or when do you know not to tighten anymore?\n\nThanks 🙂 looks awesome!
Beth W.: I used to have the problem of the screws blowing out the end of the wood too – I realized that my drill was set at a torque level that was too high. I keep it high for drilling (10+) and then 7 or under for putting my screws in the pocket holes
Chicken coop plans manual | Related Posts:

Tags: contented chicken, Shed Coop, white-colored
Comments are closed here.