
I Really Like looking at the other party’s chicken set ups! I like to see different methods to problems all of us face, seeing the creativeness individuals have utilized in housing & taking care of their flock, and becoming new suggestions for my coop obviously (which never appears to become “done”).
My spouse and i aren’t always handy, getting only moderate woodworking skills our coop is way from perfect. But it keeps our flock dry and safe therefore it works best for us! I humbly supply my chicken house & run – I think you’ll will find some inspiration here!
Our coop story
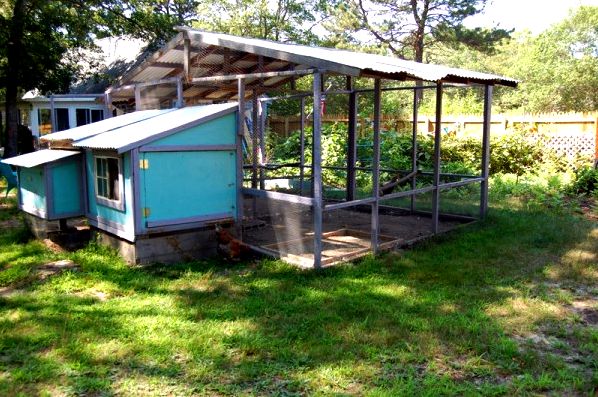
This Year whenever we first built our coop, we’d only four hens. We began having a fundamental 4×4 coop with exterior nest boxes, by having an 8×11 run. We were built with a large window in-front & and lengthy vent within the back for ventilation, in addition to two circular vents on each side. For the leading window, we purchased a playhouse window that may open. We installed it backwards therefore we could operate the latches in the outdoors without getting to climb within the chicken house. Both the left & right sides from the coop had huge access doorways which made cleaning & taking care of the chickens fast & easy.
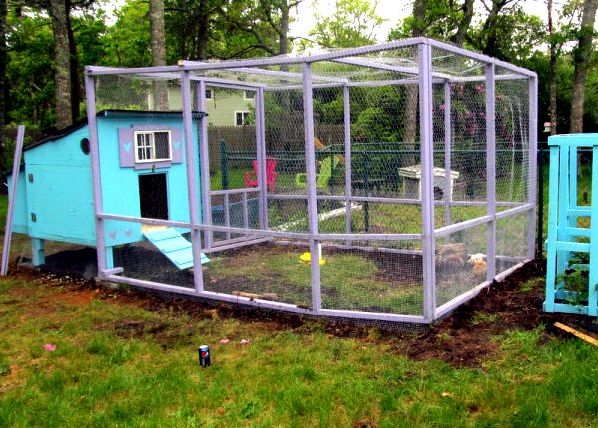
The coop had two huge nest boxes and 4ft of roost space. The run was spacious for four wild birds and completely secure, additionally, it offered a shady place underneath the coop they might relax in. We hidden hardware cloth wire 18 inches lower completely round the run. I can’t even let you know the quantity of foiled attempts to go into run recommendations through the years. Especially in the winter months, we just about every day find holes where critters (mostly rodents) attempt to dig in to the run but get stopped through the wire. Burying wire wasn’t an enjoyable job however it was 110% worthwhile! The run is 6 ft tall therefore we may get inside to clean and going to the women. The bottom 2 ft from the run walls are covered in hardware cloth and also the top 4 ft is included in chicken wire. It would be a good compromise supplying predator security and maintaining your cost lower (I can’t believe how costly wire is!). The the surface of the run was covered in chicken wire to safeguard from hawks. It was an incredible starter coop but because the hatchery catalogs came moving in, we very rapidly outgrew it! After annually I understood it simply wasn’t large enough, there are plenty of awesome chicken breeds how can you limit you to ultimately only four hens???
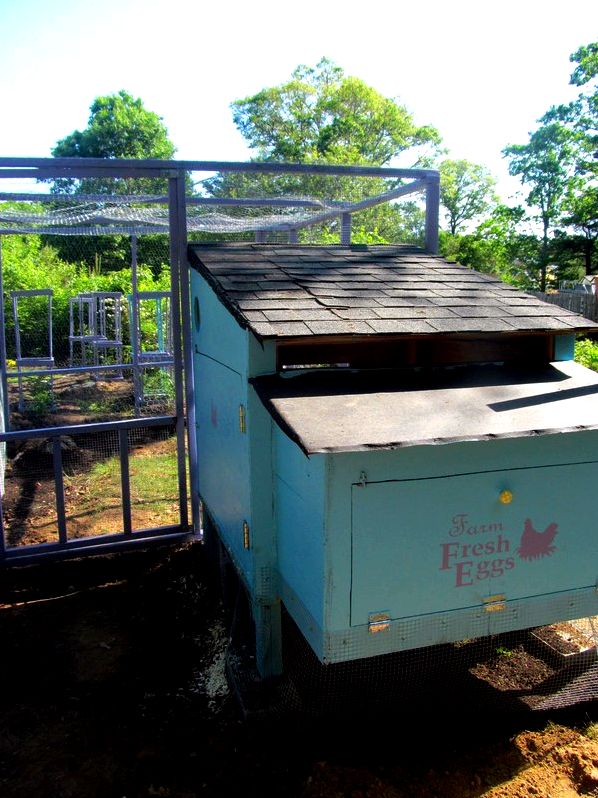
We’d already invested a lot profit this coop/run setup there wasn’t any approach we take to would scrap it and begin again only one year in. We made the decision the chickens just needed a house addition! We built a replica coop, exactly the same 4×4 coop but with no nest box. We connected the 2 coops after which did exactly the same for that run. Instead of the nest box within the back, the brand new coop includes a large window to usher in light & ventilation. For the brand new coop, we relocated the lengthy, horizontal vent. On that old coop, it’s from the back, approximately the nest boxes. When we built the coop, we hadn’t recognized that vent seemed to be next to the roosts. The poor women had chilly air blowing directly in their way all winter that year. For the brand new coop, we place the vent around the front, in the greatest point, where that warm, moist air could rise and escape.
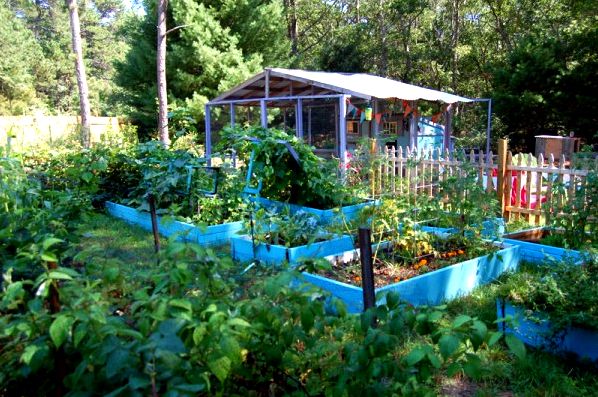
We built another 8×11 run next to the old one. So we now have a 4×8 coop (plus nest boxes) as well as an 11×16 run (plus covered area underneath the coops). We left the wall between your runs up with the exception of one section. It is handy so that you can just close-up that section when we have to separate some chickens. It also gave us a easily placed wall to aid the rooftop in the centre.
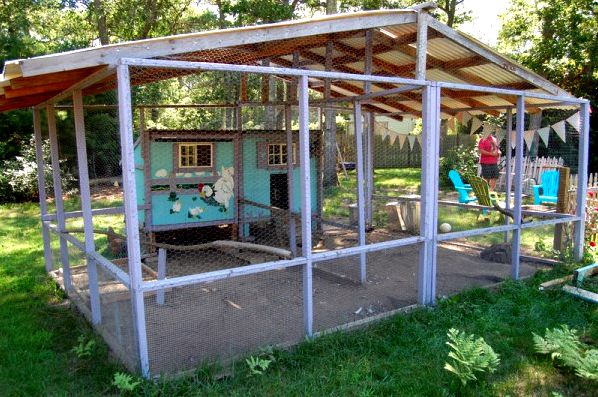
The chicken wire roof around the old run was proficient at keeping predators out, however it was awful during the cold months. The weight from the snow around the wire made it sag lower. It am extended out by spring I couldn’t stand straight within the run any longer. So whenever we expanded, we opted to pay for the whole run with solid, plastic roofing in an position therefore the snow won’t stack up. We allow the roof extend out in the ends to give to us a semi sheltered place to keep your feed cans. The roosts within the run are simply old branches which had fallen within our property, so we had space to include a “sand box” for dust bathing.
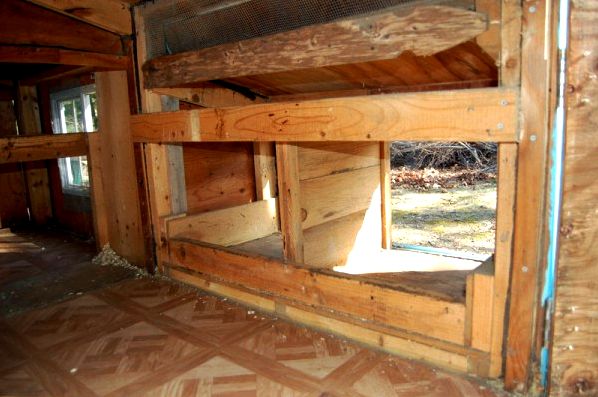
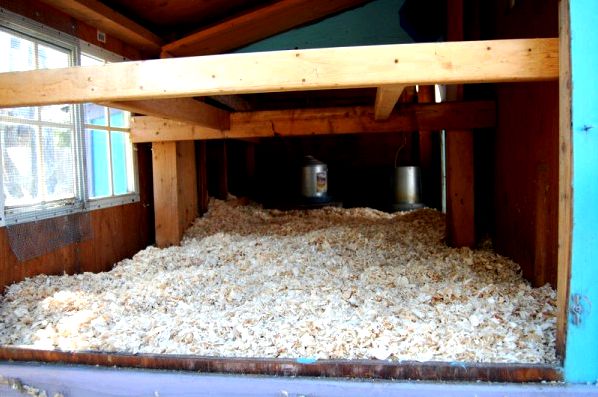
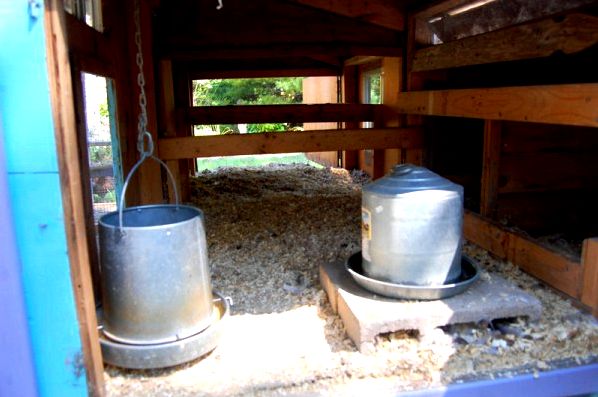
We’ve cheap peel & stick tile floor inside, it’s quite simple to help keep neat and because they get broken they are simple to pull-up and replace a piece without replacing the entire floor. Now we make use of the old portion of the coop to keep your feed & water, the nest boxes exist plus an overflow roost. The new portion of the home is the “bedroom”, it’s essentially all roost space in there. There is really a large, south facing window within the back in addition to a second, smaller sized window right in front.
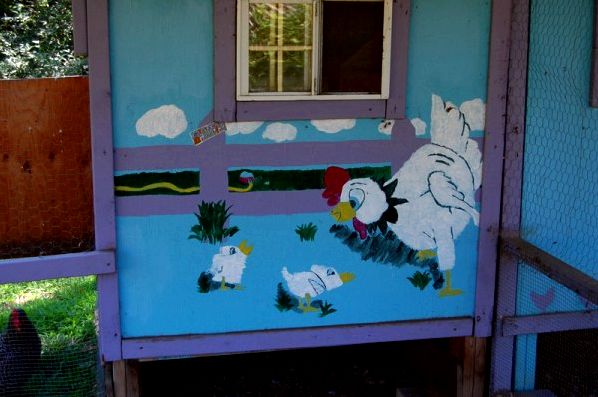
Outdoors, the chickens connect beneath the coop to some shady, sheltered area. They like to spend time under there during the cold months to flee the snow, as well as in the summer time to flee heat and also to hide from driving rain or wind. The old coop section’s bottom is simply wire to allow the breeze in, the new coop section’s bottom continues to have the wire to help keep out predators, it has wooden boards to help keep the wind & snow. My daughter colored an enjoyable chicken mural around the new section…just just for fun. 🙂 And obviously we colored the brand new coop the same vibrant blue to complement that old coop and elevated beds within the adjacent garden. Our flock presently has 14 wild birds, some bantam, some standard size, which is actually a significant amount for all of us.
But as I stated it’s ever evolving and try to a piece happening. The next project is diving the nest box area from two huge boxes into four smaller sized ones!
>

Resourse: http://thecapecoop.com/photo-tour-of-our-chicken-coop/
Tour of our Chicken COOP
Video COMMENTS:
Graham R Dyer: Nice birds and set up.
John Norris: Hey there, This was the first of your videos I have ever watched. I like your coop setup! I was wondering what breed of chickens you have there and if you like them? I'm guessing orpington.\n\nPS – Explorer Steve sent me your way.
JessieJames Homestead: +John Norris You are correct sir. Orpington. We are a new channel just started late August. Please stay and enjoy the rest of our videos.
John Norris: +Jessie James- I will!
kenswift302: nice video hope to see plenty more. \np.s Xplorer Steve sent me.
JessieJames Homestead: +kenswift302 Thank you very much for coming!
NoBudgetHomestead: good looking coop and hens! funny seeing a hen get so bossy and playing the role of the rooster!! 🙂 God Bless!!
JessieJames Homestead: Hey, thank you, God Bless!
hella random: you don't need a heater. as "cold" as it gets where your at, as long as there is no draft in it there is no need in heating
JessieJames Homestead: That's true��
Chicken coop plans manual | Related Posts:

Tags: chicken, house, photo, tour
Comments are closed here.